- Nederlands, Belgique / België
- Česky, Česká republika
- Deutsch, Deutschland
- Español, España
- Português, Portugal
- English, Europe
- Français, France
- Italiano, Italia
- Magyar, Magyarország
- Nederlands, Nederland
- Deutsch, Österreich
- Polski, Polska
- Română, România
- Suisse / Schweiz / Svizzera
- Svenska, Sverige
- Suomeksi, Suomi
- Türkçe, Türkiye
- English, United Kingdom
- Slovenská, Slovak
-
Worldwide


 Welkom bij Mitutoyo Nederland, België en Danmark
- Alle Product Highlights
- Nieuw SmartMeasure-AL
- Nieuwe SJ-220
- Nieuwe QuantuMike
- LEGEX Takumi
- Schuifmaten
- Measurlink 10
- HR-600 Series
- TAGLENS
- MCOSMOS 5
- Crysta Apex V
- Formtracer Avant
- MiSTAR 555
- Bluetooth Data Communicatie
- Profielprojector PJ Plus
- QuickVision Pro
- Alle Producten per Industrie
- MeasurLink 10
- MeasurLink 10
- Medical
- Automotive
- Aerospace
- Energy
- Gen. Manufacturing
- Electronics
- Case Studies
- Alle Handmeetgereedschappen
- Schuifmaten
- Schroefmaten
- Binnenmeetinstrumenten
- Diepte meetinstrumenten
- Hoogtemeters
- Meetklokken en Snelopnemers
- Hulpstukken en diversen
- Kalibratie instrumenten
- Eindmaten
- Geautomatiseerde meetsystemen
- Alle CMM
- Kleine en middelgrote CMM's
- In-Line en werkvloer CMMs
- CMMs met grote afmetingen
- CMM Rotatie tafels
- CMM Tastsystemen
- Styli
- Opspansystemen
- CMM Accessoires
- CMM Software
- SmartMeasure-AL
- Alle Vision
- 2D Vision Meetsystemen Quick Image
- Manueel 3D Vision Meetsystemen Quick Scope
- 3D CNC Vision Meetsystemen Quick Vision
- 3D CNC Multisensor Meetsystemen Quick Vision
- 3D CNC Meetsystemen voor Micro Geometrieën
- Objectieven en kalibratiekaarten
- Alle Optisch
- Loepen
- Profiel Projectoren
- Meetmicroscopen
- Microscoop Units
- Oculairs en Objectieven
- TAGLENS
- Schuifmaten
- Digitale schuifmaten
- Schuifmaten voor speciale doeleinden
- Analoge schuifmaten
- Schuifmaat accessoires
- Schroefmaten
- Digimatic schroefmaten & Analoge schroefmaten
- Accessoires voor schroefmaten
- Inbouwschroefmaten
- Accessoires voor inbouwschroefmaten
- Binnenmeetinstrumenten
- Binnenmeetinstrumenten
- Binnenmeettasters
- Accessoires voor binnenmeetinstrumenten
- Meetklokken en Snelopnemers
- Digitale meetklok
- Accessoires voor meetklokken
- Zwenktaster
- Meetklok
- Accessoires voor meetklokken
- Diktemeter, dieptemeter
- Hulpstukken en diversen
- Statieven
- Precisie spanklemmen
- Vlakplaten en sinusplaten
- Hoekmetingen en raamwaterpassen
- Voelermaten en linialen
- Eindmaten
- Stalen eindmatensets
- Stalen losse eindmaten
- CERA eindmatensets
- CERA keramische losse eindmaten
- Speciale eindmaten
- Accessoires voor eindmaten
- Kleine en middelgrote CMM's
- CRYSTA-Apex V - 500, 700, & 900 Series
- CRYSTA-Apex V - 1200 Series
- CRYSTA-Apex V - 1600 & 2000 Series
- CRYSTA-Apex EX Series for REVO
- STRATO-Apex - 500, 700, & 900 Series
- STRATO-Apex - 1600 Series
- LEGEX Series
- Styli
- Styli Kits
- Rechte tasters
- Diamant Tasters
- IJkkogel Keramiek Ø10,0 mm
- Tasters voor bewerkingsmachines
- Ster Tasters
- Tasters voor Ster Tasters
- Cilinder Tasters
- Schijf Tasters
- Tip Tasters
- Verlengstukken
- Houders
- Adapters
- Verbindingstukken
- Bevestiging voor taster onderdelen
- Gereedschappen voor Tasters
- StyliCleaner
- Opspansystemen
- CMM-opspansets
- eco-fix pallet opspansysteem kits
- FixtureBuilder Software
- eco-fix schroeven en gereedschappen
- eco-fix en eco-fix uitbreidingssets
- eco-fix en eco-fixplus-componenten
- 3D CNC Vision Meetsystemen Quick Vision
- Quick Vision ACTIVE
- Quick Vision APEX / HYPER
- Quick Vision ACCEL
- Quick Vision ULTRA
- Profiel Projectoren
- Profiel Projector PJ Serie
- Profiel Projector PV Serie
- Profiel Projector PH Serie
- Data Processor QM-Data
- Accessories
- Meetmicroscopen
- TM Series Gen. B
- MF Series Gen. D
- MF-U Series Gen. D
- Illumination Sources
- Vision Unit
- M2 Software
- QSPAK-VUE Software
- Oculairs en Objectieven
- ML-Series Objectives
- Brightfield Observation Objectives
- Brightfield/Darkfield Observation Objectives
- NIR Objectives
- NIR LCD Objectives
- NUV Objectives
- NUV LCD Objectives
- UV Objectives
- UV LCD Objectives
- Oppervlakte ruwheid
- Surftest SJ-220
- Surftest SJ-310
- Surftest SJ-410
- Surftest SJ-500
- Surftest SV-2100
- Surftest SJ-500P
- Surftest SV-2100P
- Formtracer Avant FTA-S3000
- Surftest Extreme SV-3000CNC
- Surftest Extreme SV-M3000CNC
- Oppervlakte ruwheid & Contour
- Formtracer Avant FTA-D3000 / FTA-D4000 Series
- Formtracer CS-3300
- Formtracer Extreme SV-C4500CNC
- Formtracer Extreme SV-C4500CNC HYBRID Type 1
- Formtracer Extreme CS-5000CNC and CS-H5000CNC
- Portable Hardness Testers
- Impact Type Hardheid Test Unit HARDMATIC HH-V400
- Digital and Analogue Durometers HARDMATIC HH-300
- Reference materials and indenters
- Hardness reference materials
- Hardness indenters and replacement balls
- Meettasters
- ABSOLUTE Digimatic Linear Gauge LGS Series
- Air Drive Unit
- ABSOLUTE Digimatic Linear Gauge LGD Series
- Standard Linear Gauge LGF Series
- Linear Gauge LG100 Series
- Linear Gauge LG200 Series
- Slim Head Linear Gauge LGK Series
- Slim Head Linear Gauge LGB Series
- Large Measuring Range Linear Gauge LG
- Laser Hologauge
- Lage meetkracht meetinstrument
- LITEMATIC VL-50 Gemotoriseerde lage meetkracht, zeer hoog nauwkeurig meetinstrument
- Tellers en uitleeseenheden
- EJ Counter and Interfaces for Linear Gauges
- EC Counter for Linear Gauges
- EG Counter for Linear Gauges
- EH Counter for Linear Gauges
- EV Counter for Linear Gauges
- Display Unit for EV Counter
- Laser Scan Micrometers
- Laser Scan Micrometer Measuring Unit
- Laser Scan Micrometer Controller Unit
- Laser Scan Micrometer Interface Unit
- Laser Scan Micrometer Optional Accessories
- DRO Linear Scales en Tellers
- DRO Linear Scales AT103
- DRO Linear Scales AT103 - High Accuracy
- DRO Linear Scales AT113
- DRO Linear Scales AT113 - High Accuracy
- DRO Linear Scales AT116
- DRO ABS Linear Scales AT715
- Universal DRO KA-200 Counter
- NC Linear Scales
- NC Linear Scales ST36
- NC Linear Scales ST46-EZA
- NC Linear Scales ABS ST700
- NC Linear Scales ABS ST1300
- NC Linear Scales AT211
- NC Linear Scales ABS AT1100
- NC Linear Scales ABS AT1300
- NC Linear Scales AT402E
- NC Linear Scales AT203
- NC Linear Scales AT402E with cable A/B
- NC Linear Scales AT402E with cable C
- Opbouwlinialen
- Horizontal ABSOLUTE Scale Coolant Proof IP66
- Horizontal ABSOLUTE Scale Standard
- Horizontal ABSOLUTE Scale Measurement Direction Switching
- Horizontal ABSOLUTE Scale Diameter Function
- Vertical ABSOLUTE Scale Standard
- Vertical ABSOLUTE Scale Measurement Direction Switching
- Vertical ABSOLUTE Scale Diameter Function
- Signaal kabels
- USB Input Tool Direct Kabel
- Digimatic Data Kabels
- Verlengkabels voor Digimatic Kabels
- Draadloze communicatie
- Wireless Communication System U-WAVE
- U-WAVE Bluetooth
- U-WAVE-T Connection Cables and Connection Units
 Original Equipment Manufacturers (OEM)
Mitutoyo OEM can address missing expertise or resources by supplying you with our renowned Metrology equipment that seamlessly integrates into your products.
 Aerospace
Complex aerospace applications need fast, extremely precise quality control to ensure accurate assemblies. See how Mitutoyo makes it happen.
 Automotive
The automotive industry continues to innovate, and Mitutoyo delivers the advanced inspection and scanning capabilities to help manufacturers achieve ongoing production
 Energy
Make critical equipment components for oil and gas, solar, wind, or nuclear as precise as possible with advanced metrology solutions from Mitutoyo.
 Medical
Boast unmatched accuracy and reliability for diagnostic and therapeutic devices, pharmaceutical goods, and countless other highly sensitive medical engineering applications with leading precision metrology solutions.
 Gen. Manufacturing
Ensure high repeatability and rigorous quality control with form measurement solutions, coordinate measuring machines and precision measuring tools from Mitutoyo.
 Electronics
The non-contact and vision measurement solutions from Mitutoyo bring microscopic accuracy to smaller and denser electronic components.
 Case Studies
For an overview of Mitutoyo's capabilities, this is no greater place to look than our marvelous collection of case studies.
 Mitutoyo Integrators
Integrating your measuring devices into existing processes made easy
 Product Demos
Online of offline, get a product demonstration today
 Manufacturing Automation Integration
Turn your factory into a smart factory with the help of Mitutoyo
 Custom Products
Custom-made products for unique applications
 Connectivity
Mitutoyo offers a range of products that incorporate connectivity features to enhance data management, analysis, and productivity.
 Helpdesk Support
Gratis Helpdesk support voor klanten met service contracten
 Kalibratie Services
Laat je meetapparatuur kalibreren door een laboratorium dat je vertrouwt
 Meetservices
Laat uw werkstukken en onderdelen opmeten door onze Aukom gecertificeerde specialisten
 Reparaties & Reserve onderdelen
Reserveonderdelen en reparaties voor Mitutoyo-apparaten
 Service contracten
Klantgericht servicecontractconcept in onderhoud en kalibratie
 Education Pack
Er is geen betere hulp dan posters of lesmateriaal van Mitutoyo, perfect voor de werkplaats of het klaslokaal.
 E-Learning
Voor degenen die geïnteresseerd zijn in metrologie biedt Mitutoyo E-Learning-cursussen om studenten, personeel of zelfs hobbyisten op te leiden.
 Online Material
Als je op zoek bent naar een snelle manier om meer te leren over meten, bekijk dan onze vele instructievideo's
 Ontdek Mitutoyo
Het grootste metrologiebedrijf ter wereld
 Certificeringen en legitimiteit
Bekijk hier onze certificeringen, accreditaties en legitimiteit zodat u verzekerd bent van betrouwbare en geverifieerde diensten.
 Merchandise
Voor degenen die in stijl over de winkelvloer willen lopen, ga naar de shop en steun je favoriete merk.
 Pers informatie
Bekijk onze laatste persberichten.
 Alle nieuwsberichten
Lees hier meer nieuws over Mitutoyo Nederland, België en Denemarken. Deze pagina wordt regelmatig vernieuwd.
 Software
Download onze software en updates gemakkelijk en snel.
 Product informatie
Bekijk en download onze catalogus, productbrochures en meer
 Software - do not use
Download onze software en updates gemakkelijk en snel
 Verklaringen van conformiteit
Hier kun je de volledige versies voor de EU en het VK downloaden
 Gratis wallpapers
Download hier gratis de officiële wallpapers van Mitutoyo
 Online Catalogus
Bekijk ons uitgebreide assortiment in onze online catalogus!
-
Products
- Terug Products
- Products
- Product Highlights
-
Producten per Industrie
- Terug Producten per Industrie Alle Producten per Industrie
- MeasurLink 10
- MeasurLink 10
- Medical
- Automotive
- Aerospace
- Energy
- Gen. Manufacturing
- Electronics
- Case Studies
-
Handmeetgereedschappen
- Terug Handmeetgereedschappen Alle Handmeetgereedschappen
- Schuifmaten
- Schroefmaten
-
Binnenmeetinstrumenten
- Terug Binnenmeetinstrumenten Binnenmeetinstrumenten
- Binnenmeetinstrumenten
- Binnenmeettasters
- Accessoires voor binnenmeetinstrumenten
-
Diepte meetinstrumenten
- Terug Diepte meetinstrumenten Diepte meetinstrumenten
- Diepte schroefmaat
- Diepteschuitmaat
- Diepteschuifmaat accessoires
- Hoogtemeters
- Meetklokken en Snelopnemers
- Hulpstukken en diversen
-
Kalibratie instrumenten
- Terug Kalibratie instrumenten Kalibratie instrumenten
- Hoogteschroefmaat Height Master
- Stappeneindmaat
- Kalibratie apparatuur
- Eindmaten
- Geautomatiseerde meetsystemen
-
CMM
- Terug CMM Alle CMM
- Kleine en middelgrote CMM's
-
In-Line en werkvloer CMMs
- Terug In-Line en werkvloer CMMs In-Line en werkvloer CMMs
- MACH Ko-ga-me
- MACH 3A 653
- MACH V 9106
- MiSTAR 555
-
CMMs met grote afmetingen
- Terug CMMs met grote afmetingen CMMs met grote afmetingen
- CARB-Series
- CMM Rotatie tafels
-
CMM Tastsystemen
- Terug CMM Tastsystemen CMM Tastsystemen
- SurfaceMeasure
- REVO
- SP80
- TP7M
-
Styli
- Terug Styli Styli
- Styli Kits
- Rechte tasters
- Diamant Tasters
- IJkkogel Keramiek Ø10,0 mm
- Tasters voor bewerkingsmachines
- Ster Tasters
- Tasters voor Ster Tasters
- Cilinder Tasters
- Schijf Tasters
- Tip Tasters
- Verlengstukken
- Houders
- Adapters
- Verbindingstukken
- Bevestiging voor taster onderdelen
- Gereedschappen voor Tasters
- StyliCleaner
- Opspansystemen
-
CMM Accessoires
- Terug CMM Accessoires CMM Accessoires
- Behuizingen
- Veiligheidssystemen
-
CMM Software
- Terug CMM Software CMM Software
- MiCAT Planner
- MCOSMOS
- MAFIS Express
- MSURF
- SmartMeasure-AL
-
Vision
- Terug Vision Alle Vision
-
2D Vision Meetsystemen Quick Image
- Terug 2D Vision Meetsystemen Quick Image 2D Vision Meetsystemen Quick Image
- Quick Image
- Quick Image Software
-
Manueel 3D Vision Meetsystemen Quick Scope
- Terug Manueel 3D Vision Meetsystemen Quick Scope Manueel 3D Vision Meetsystemen Quick Scope
- Manual Quick Scope
- Quick Scope Software
-
3D CNC Vision Meetsystemen Quick Vision
- Terug 3D CNC Vision Meetsystemen Quick Vision 3D CNC Vision Meetsystemen Quick Vision
- Quick Vision ACTIVE
- Quick Vision APEX / HYPER
- Quick Vision ACCEL
- Quick Vision ULTRA
-
3D CNC Multisensor Meetsystemen Quick Vision
- Terug 3D CNC Multisensor Meetsystemen Quick Vision 3D CNC Multisensor Meetsystemen Quick Vision
- Quick Vision Hybrid
- Quick Vision WLI
-
3D CNC Meetsystemen voor Micro Geometrieën
- Terug 3D CNC Meetsystemen voor Micro Geometrieën 3D CNC Meetsystemen voor Micro Geometrieën
- UMAP Vision Systems
- UMAP Software
- Objectieven en kalibratiekaarten
- Optisch
- Vorm
-
Hardheid
- Terug Hardheid Alle Hardheid
- Portable Hardness Testers
-
Hardness Testing Software
- Terug Hardness Testing Software Hardness Testing Software
- AVPAK
-
Reference materials and indenters
- Terug Reference materials and indenters Reference materials and indenters
- Hardness reference materials
- Hardness indenters and replacement balls
-
Sensoren
- Terug Sensoren Alle Sensoren
-
Meettasters
- Terug Meettasters Meettasters
- ABSOLUTE Digimatic Linear Gauge LGS Series
- Air Drive Unit
- ABSOLUTE Digimatic Linear Gauge LGD Series
- Standard Linear Gauge LGF Series
- Linear Gauge LG100 Series
- Linear Gauge LG200 Series
- Slim Head Linear Gauge LGK Series
- Slim Head Linear Gauge LGB Series
- Large Measuring Range Linear Gauge LG
- Laser Hologauge
-
Lage meetkracht meetinstrument
- Terug Lage meetkracht meetinstrument Lage meetkracht meetinstrument
- LITEMATIC VL-50 Gemotoriseerde lage meetkracht, zeer hoog nauwkeurig meetinstrument
- Tellers en uitleeseenheden
- Laser Scan Micrometers
-
Surface Measure
- Terug Surface Measure Surface Measure
- Surface Measure 1008S
- Accessories
- Sensor Management Software
-
Digital Scales
- Terug Digital Scales Alle Digital Scales
- DRO Linear Scales en Tellers
-
NC Linear Scales
- Terug NC Linear Scales NC Linear Scales
- NC Linear Scales ST36
- NC Linear Scales ST46-EZA
- NC Linear Scales ABS ST700
- NC Linear Scales ABS ST1300
- NC Linear Scales AT211
- NC Linear Scales ABS AT1100
- NC Linear Scales ABS AT1300
- NC Linear Scales AT402E
- NC Linear Scales AT203
- NC Linear Scales AT402E with cable A/B
- NC Linear Scales AT402E with cable C
-
Opbouwlinialen
- Terug Opbouwlinialen Opbouwlinialen
- Horizontal ABSOLUTE Scale Coolant Proof IP66
- Horizontal ABSOLUTE Scale Standard
- Horizontal ABSOLUTE Scale Measurement Direction Switching
- Horizontal ABSOLUTE Scale Diameter Function
- Vertical ABSOLUTE Scale Standard
- Vertical ABSOLUTE Scale Measurement Direction Switching
- Vertical ABSOLUTE Scale Diameter Function
-
Data Management
- Terug Data Management Alle Data Management
-
Data Management Software
- Terug Data Management Software Data Management Software
- MeasurLink 10
- USB-ITPAK
-
Mini Processors
- Terug Mini Processors Mini Processors
- Digimatic Mini Processor DP-1VA LOGGER
- Signaal kabels
- Draadloze communicatie
- Interfaces
-
Timerbox, Digimatic Switch Box, Tolerance Box
- Terug Timerbox, Digimatic Switch Box, Tolerance Box Timerbox, Digimatic Switch Box, Tolerance Box
- Digimatic Timerbox
- Digimatic Switch Box
- Industries
- Smart Factory
- Service
-
Educatie
- Terug Educatie
- Educatie
- Education Pack
- E-Learning
- Online Material
-
Over ons
- Terug Over ons
- Over ons
- Ontdek Mitutoyo
-
Certificeringen en legitimiteit
- Terug Certificeringen en legitimiteit
- Certificeringen en legitimiteit
- Certificaten & Accreditaties
- Legitimiteit van de producten (FAKE)
- Mitutoyo Danmark
- Merchandise
-
Nieuws
- Terug Nieuws
- Nieuws
-
Onze promoties
- Terug Onze promoties
- Onze promoties
- Pers informatie
- Evenementen
-
Alle nieuwsberichten
- Terug Alle nieuwsberichten
- Alle nieuwsberichten
- Klantcase - Mitutoyo en Nemera: Partnerschap op het gebied van nauwkeurige farmaceutische apparatuur
- EMO 2025
- Klantcase - Ceratec en Mitutoyo profiteren van elkaars expertises
- TechDemoweek 2025
- MITUTOYO VERSTERKT MET R&D DE EIGEN MARKTGEDREVEN AANPAK
- MITUTOYO, CRAFT EDUCATION EN DMG MORI BRENGEN METEN EN MAKEN BIJ ELKAAR
- Downloads
Widely recognised as the world leader in the design and manufacture of transmission and drive train technology, Xtrac has built its business and reputation on a passion for innovation, precision and quality. So, when the company needed a metrology supplier with likeminded principles, the Thatcham based Company naturally turned to Mitutoyo.
Xtrac still powering along with Mitutoyo
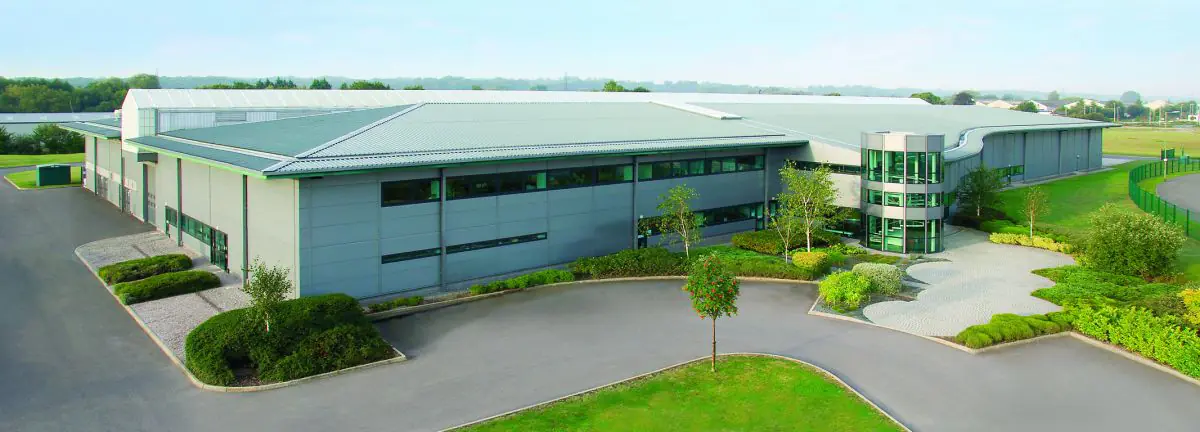
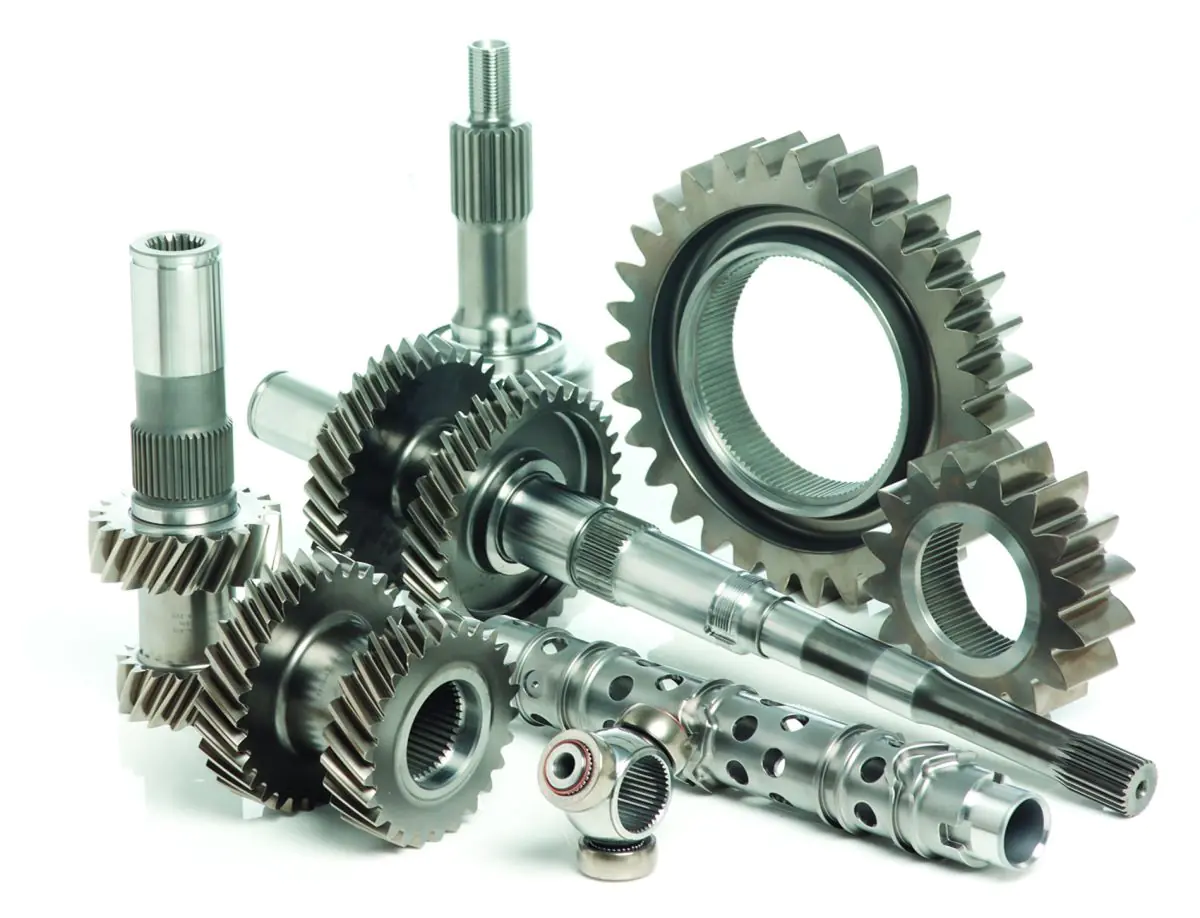
Established in 1984, and manufacturing everything from casings through to gears, shafts, crown wheels and pinions and everything else that constitutes a high performance motorsport transmission system; Xtrac utilises high specification casting, milling, turning, grinding, EDM, surface finishing, gear cutting and grinding technologies – all inspected with Mitutoyo metrology equipment.
Xtrac Inspection Manager Mr Neil Warwick has been at the staff owned business since it was a small 15 employee company back in 1988. At the once fledgling company, Mr Warwick was instrumental in specifying Mitutoyo equipment almost 30 years ago.
Recalling the first Mitutoyo CMM the company purchased, Mr Warwick says: "At the time, all our customers in the motorsport and F1 industries were employing Mitutoyo equipment. We looked at what they were using and we wanted equipment to create a synergy with our customers. Except for the machine shop micrometers, our first foray into Mitutoyo was a manual BHN706 CMM in 1990. This was rapidly followed in the mid-1990s by Mitutoyo BHN544 and BNH706 CNC CMMs as our business rapidly expanded in line with the F1 industry widely employing our transmission technology."
In 2000, the company moved to its purpose built 88,000sq/ft UK factory to accommodate its exponential growth and this noted the arrival of numerous Mitutoyo inspection systems to support the increase manufacturing output. The Berkshire business retained its Mitutoyo CNC CMM systems with Renishaw PH Series motorised indexing heads that enable the CMM’s to achieve complete programmable probe orientation. Attached to the motorised Renishaw heads are the TP200 Series of probe bodies and stylus modules from 1mm to 6mm diameter. With CMMs in satellite inspection rooms on the shop floor as well as in the main inspection department, Xtrac specified the same probe bodies and styli for all its CMMs.
Since moving to its state-of-the-art facility over a decade ago, Xtrac has expanded to 330 staff with 20 employees in the meticulous inspection department. As part of this growth, Xtrac acquired two compact Crysta-Apex S544 CNC CMMs with a 500 by 400 by 400mm work area. One was bought to support growth and the other to replace an ageing CMM. For the inspection of larger components, Xtrac purchased a Crysta C9106 CNC CMM with a 900 by 1000 by 600mm working area. These three CMMs were accompanied by the arrival of three Crysta S776 CNC CMMs in the last two years. These most recent arrivals were all direct replacements for the BHN Series CMMs that had been at Xtrac for over 20 years.
Commenting upon this, Mr Warwick recalls: “The fact that we’ve had Mitutoyo CMMs for 20 years speaks volumes for the performance, reliability, consistency and ability of Mitutoyo CMMs to conform to our impeccable standards. Naturally the CMMs have evolved from the old DOS based systems. All our CMMs now run on Mitutoyo’s Windows based MCOSMOS 3.5 software. The technology in the modern CMMs and particularly the MCOSMOS software enables us to import CAD data, program our parts faster, improve both on and off-line part-program creation from imported CAD models and also extend our geometry handling of freeform surfaces. Added to this, the axis movements and motors in the new CMM’s are faster than previous generation CMMs, resulting in reduced inspection cycle times”
All six CMMs at Xtrac utilise the same Mitutoyo MCOSMOS software, the same workholding jigs and fixtures and also the same Renishaw probing systems. Alluding to this, Mr Warwick says: “We have a number of CMMs on the shop floor as well as in our inspection department. All CMMs are networked, so we can easily transfer programs and data to reduce programming times and eliminate program duplication. This can make inspection as simple as just a ‘touch of a button’ on the CMM.”
This level of automation is critical for a company that manufactures complex parts in small batches with an often high level of SPC and reporting required. “All our customers are different in their demands. Some customers require complete reporting and traceability whereas other customers only want inspection data for critical features. Whatever the requirement, the Mitutoyo CMMs provide comprehensive reporting on all geometrical tolerances and features, if the customers need it. Furthermore, this data is all stored on our system for historical traceability purposes.”
Tracing a Strategy For Success
With the ever increasing complexity of parts, a CMM cannot support the measuring of all geometries and features. This was apparent for Xtrac when a particular F1 component had undercuts on form gears that needed to be machined and measured to tolerances of +/-5 microns. Commenting on this, Mr Warwick recalls: “We had a specific need to measuring a feature that couldn’t be resolved with a CMM. We got in contact with Mitutoyo and they recommended a Contracer.”
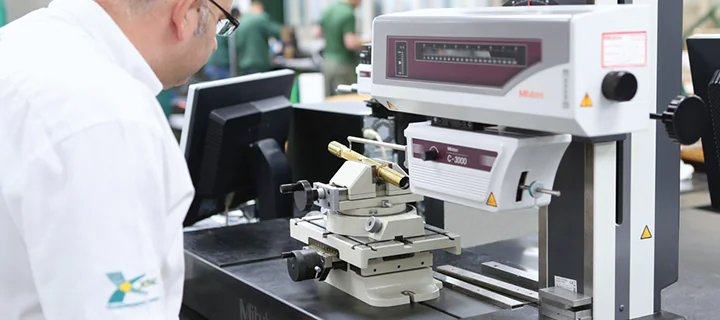
The Formtracer contour measuring machine delivers extremely precise and simplified CNC measurement. Featuring a precision arc-scale built into the Z1 axis detector that allows the arc trajectory of the stylus tip to be read directly, the Formtracer SVC-3100W8 specified by Xtrac minimizes error for best in-class accuracy. “The Formtracer arrived over 10 years ago, but we quickly realised how the Formtracer complements the CMMs. With the inclusion of surface texture measurement hardware the Formtracer also supplemented the basic surface texture measurement equipment that was currently in use at the time.
The capability and success of the Formtracer soon brought the arrival of two Contracer CV-3100H8 machines with an X and Z2 axis travel of 200mm and 500mm respectively. This was followed by a smaller CV-3100H4 machine. We use our Contracers for the 2D measuring of many non-geometric shapes and features such as undercuts, grooves and very small radii. They are fast, efficient, precise and perfectly meet our needs.”
The increasing demand for surface texture measurement, especially for gear teeth, quickly became too much of a capacity restraint for the Formtracer, leading to the purchase of dedicated, fully featured surface texture measurement machine. “We needed to increase surface finish measurement because some gear surfaces are in continuous contact with other surfaces. By controlling and measuring surface finishes on faces that are critical to the function of a component, we have minimised abrasion and enhanced the quality of critical gears and their operational functionality. The Formtracer has two heads, so it was conducting surface finish measurements as well as checking complex geometries. Before we knew it, we were loaded with work for the Formtracer, so we added a Mitutoyo SJ500P Surftest for alleviating the capacity on the Formtracer.”
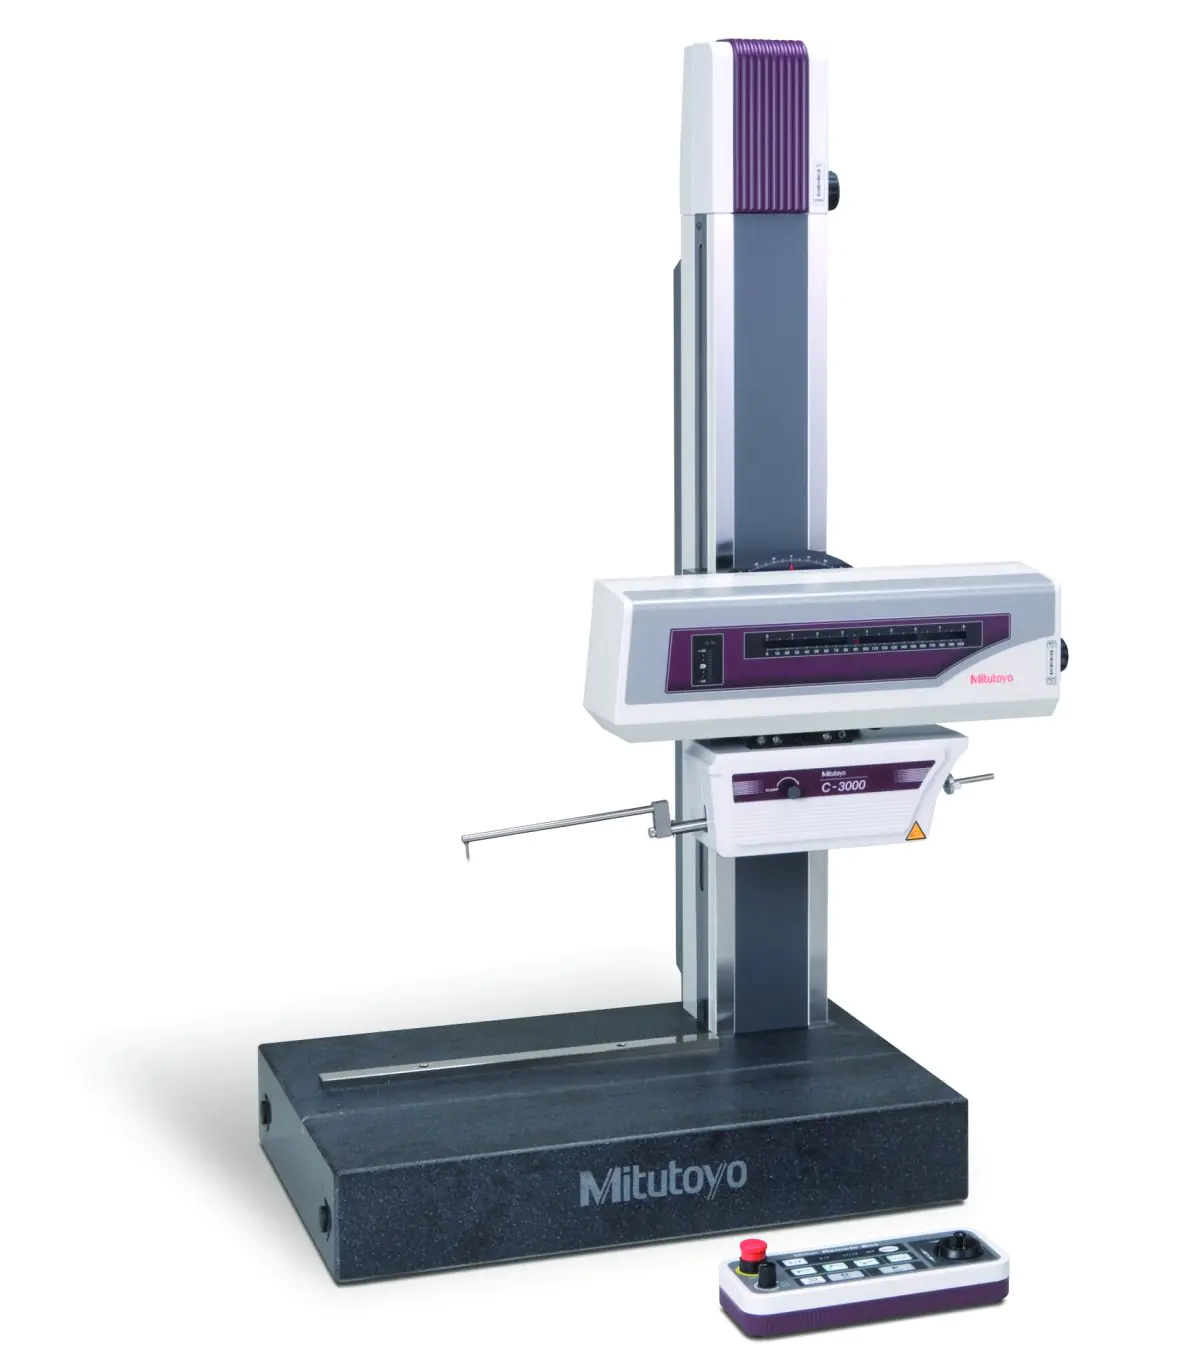
The SJ500-P is a high precision, high-performance surface roughness tester with PC control and the same software as deployed on the Formtracer, so training wasn’t an issue. The built-in joystick on the control unit enables quick and easy positioning whilst a manual adjustment knob allows fine positioning of a small stylus for positioning.
Concluding upon the working relationship with Mitutoyo, Mr Warwick says: “In my 29 years with Xtrac, we have evolved from a small innovative business to a global leader in drive train and transmission systems for the most demanding motorsport and high performance engineering applications. Along our journey to global success, Mitutoyo has been at our side. Firstly, we had micrometers and vernier callipers, then manual to CNC CMMs and now the addition of Contracers, Formtracers Optical Projectors, and surface texture measurment. Down the generations, Mitutoyo has been at our side, supporting all our metrology needs with industry leading products, training and support. Over this period, the rapid emergence of ever more complex components required at shorter lead-times with greater certification has been comfortably managed by the Mitutoyo equipment. This is credit to the software and technology that networks all our metrology equipment and delivers comprehensive reporting of all the required dimensions and data.”


