- Nederlands, Belgique / België
- Česky, Česká republika
- Deutsch, Deutschland
- Español, España
- Português, Portugal
- English, Europe
- Français, France
- Italiano, Italia
- Magyar, Magyarország
- Nederlands, Nederland
- Deutsch, Österreich
- Polski, Polska
- Română, România
- Français / Deutsch, Suisse / Schweiz
- Svenska, Sverige
- Suomeksi, Suomi
- Türkçe, Türkiye
- English, United Kingdom
- Slovenská, Slovak
-
Worldwide


 Welkom bij Mitutoyo Nederland, België en Danmark
- Alle Product Highlights
- Nieuwe SJ-220
- Nieuwe QuantuMike
- LEGEX Takumi
- Measurlink 10
- HR-600 Series
- TAGLENS
- MCOSMOS 5
- Crysta Apex V
- Formtracer Avant
- MiSTAR 555
- Schuifmaten
- Bluetooth Data Communicatie
- Profielprojector PJ Plus
- QuickVision Pro
- Alle Producten per Industrie
- MeasurLink 10
- MeasurLink 10
- Medical
- Automotive
- Aerospace
- Energy
- Gen. Manufacturing
- Electronics
- Case Studies
- Alle Handmeetgereedschappen
- Schuifmaten
- Schroefmaten
- Binnenmeetinstrumenten
- Diepte meetinstrumenten
- Hoogtemeters
- Meetklokken en Snelopnemers
- Hulpstukken en diversen
- Kalibratie instrumenten
- Eindmaten
- Alle CMM
- Kleine en middelgrote CMM's
- CMMs met grote afmetingen
- In-Line en werkvloer CMMs
- CMM Tastsystemen
- Styli en accessoires
- Opspansystemen
- KMG behuizing
- CMM Software
- Alle Vision
- 2D Vision Meetsystemen Quick Image
- Manueel 3D Vision Meetsystemen Quick Scope
- 3D CNC Vision Meetsystemen Quick Vision
- 3D CNC Multisensor Meetsystemen Quick Vision
- Serie 365 - CNC Visionmeetsysteem
- 3D CNC Meetsystemen voor Micro Geometrieën
- Vision System Software
- Objectieven en kalibratiekaarten
- Alle Optisch
- Loepen
- Profiel Projectoren
- Meetmicroscopen
- Microscoop Units
- Oculairs en Objectieven
- TAGLENS
- Illumination Units
- Alle Hardheid
- Portable Hardness Testers
- Combination Testers
- Vickers Testers
- Automatic Vickers Testers
- Micro-Vickers Testers
- Hardness Testing Software
- Reference materials and indenters
- Alle Sensoren
- Meettasters
- Lage meetkracht meetinstrument
- Tellers en uitleeseenheden
- Laser Scan Micrometers
- Surface Measure
- Sensor Management Software
- Schuifmaten
- Digitale schuifmaten
- Schuifmaten voor speciale doeleinden
- Analoge schuifmaten
- Schuifmaat accessoires
- Schroefmaten
- Digimatic schroefmaten & Analoge schroefmaten
- Accessoires voor schroefmaten
- Inbouwschroefmaten
- Accessoires voor inbouwschroefmaten
- Binnenmeetinstrumenten
- Binnenmeetinstrumenten
- Binnenmeettasters
- Accessoires voor binnenmeetinstrumenten
- Meetklokken en Snelopnemers
- Digitale meetklok
- Accessoires voor meetklokken
- Zwenktaster
- Meetklok
- Accessoires voor meetklokken
- Diktemeter, dieptemeter
- Hulpstukken en diversen
- Statieven
- Precisie spanklemmen
- Vlakplaten en sinusplaten
- Hoekmetingen en raamwaterpassen
- Voelermaten en linialen
- Eindmaten
- Stalen eindmatensets
- Stalen losse eindmaten
- CERA eindmatensets
- CERA keramische losse eindmaten
- Speciale eindmaten
- Accessoires voor eindmaten
- Kleine en middelgrote CMM's
- CRYSTA-Apex V - 500, 700, & 900 Series
- CRYSTA-Apex V - 1200 Series
- CRYSTA-Apex V - 1600 & 2000 Series
- CRYSTA-Apex EX Series for REVO
- STRATO-Apex - 500, 700, & 900 Series
- STRATO-Apex - 1600 Series
- LEGEX Series
- Styli en accessoires
- Styli Kits
- Rechte tasters
- Diamant Tasters
- IJkkogel Keramiek Ø10,0 mm
- Tasters voor bewerkingsmachines
- Ster Tasters
- Tasters voor Ster Tasters
- Cilinder Tasters
- Schijf Tasters
- Tip Tasters
- Verlengstukken
- Houders
- Adapters
- Verbindingstukken
- Bevestiging voor taster onderdelen
- Gereedschappen voor Tasters
- StyliCleaner
- Opspansystemen
- Fixturing Kits
- Base Plates
- Build-up Components
- Positioning & Stopper Components
- Profile Components
- Base Components
- Clamping Components
- Adapters
- Slider Components
- Racks
- 3D CNC Vision Meetsystemen Quick Vision
- Quick Vision ACTIVE
- Quick Vision APEX / HYPER
- Quick Vision ACCEL
- Quick Vision ULTRA
- Profiel Projectoren
- Profiel Projector PJ Serie
- Profiel Projector PV Serie
- Profiel Projector PH Serie
- Data Processor QM-Data
- Accessories
- Meetmicroscopen
- TM Series Gen. B
- MF Series Gen. D
- MF-U Series Gen. D
- Illumination Sources
- Vision Unit
- M2 Software
- QSPAK-VUE Software
- Oculairs en Objectieven
- ML-Series Objectives
- Brightfield Observation Objectives
- Brightfield/Darkfield Observation Objectives
- NIR Objectives
- NIR LCD Objectives
- NUV Objectives
- NUV LCD Objectives
- UV Objectives
- UV LCD Objectives
- Oppervlakte ruwheid
- Surftest SJ-210
- Surftest SJ-310
- Surftest SJ-410
- Surftest SJ-500
- Surftest SV-2100
- Surftest SJ-500P
- Surftest SV-2100P
- Formtracer Avant FTA-S3000
- Surftest Extreme SV-3000CNC
- Surftest Extreme SV-M3000CNC
- Oppervlakte ruwheid & Contour
- Formtracer Avant FTA-D3000 / FTA-D4000 Series
- Formtracer CS-3300
- Formtracer Extreme SV-C4500CNC
- Formtracer Extreme SV-C4500CNC HYBRID Type 1
- Formtracer Extreme CS-5000CNC and CS-H5000CNC
- Portable Hardness Testers
- Impact Type Hardness Testing Unit HARDMATIC HH-411
- Digital and Analogue Durometers HARDMATIC HH-300
- Combination Testers
- Rockwell HR-200/300/400
- Rockwell, Rockwell Superficial, Brinell Hardness Tester HR-530 and HR-600
- Rockwell Automatic Hardness Testing HR-600
- Automatic Vickers Testers
- Automatic Micro-Vickers hardness testing systems
- Automatic Vickers hardness testing systems
- Reference materials and indenters
- Hardness reference materials
- Hardness indenters and replacement balls
- Meettasters
- ABSOLUTE Digimatic Linear Gauge LGS Series
- Air Drive Unit
- ABSOLUTE Digimatic Linear Gauge LGD Series
- Standard Linear Gauge LGF Series
- Linear Gauge LG100 Series
- Linear Gauge LG200 Series
- Slim Head Linear Gauge LGK Series
- Slim Head Linear Gauge LGB Series
- Large Measuring Range Linear Gauge LG
- Laser Hologauge
- Lage meetkracht meetinstrument
- LITEMATIC VL-50 Gemotoriseerde lage meetkracht, zeer hoog nauwkeurig meetinstrument
- Tellers en uitleeseenheden
- EJ Counter and Interfaces for Linear Gauges
- EC Counter for Linear Gauges
- EG Counter for Linear Gauges
- EB Counter for Linear Gauges
- EH Counter for Linear Gauges
- EV Counter for Linear Gauges
- Display Unit for EV Counter
- Laser Scan Micrometers
- Laser Scan Micrometer Measuring Unit
- Laser Scan Micrometer Controller Unit
- Laser Scan Micrometer Interface Unit
- Laser Scan Micrometer Optional Accessories
- DRO Linear Scales en Tellers
- DRO Linear Scales AT103
- DRO Linear Scales AT103 - High Accuracy
- DRO Linear Scales AT113
- DRO Linear Scales AT113 - High Accuracy
- DRO Linear Scales AT116
- DRO ABS Linear Scales AT715
- Universal DRO KA-200 Counter
- NC Linear Scales
- NC Linear Scales ST36
- NC Linear Scales ST46-EZA
- NC Linear Scales ABS ST700
- NC Linear Scales ABS ST1300
- NC Linear Scales AT211
- NC Linear Scales ABS AT1100
- NC Linear Scales ABS AT1300
- NC Linear Scales AT402E
- NC Linear Scales AT203
- NC Linear Scales AT402E with cable A/B
- NC Linear Scales AT402E with cable C
- Opbouwlinialen
- Horizontal ABSOLUTE Scale Coolant Proof IP66
- Horizontal ABSOLUTE Scale Standard
- Horizontal ABSOLUTE Scale Measurement Direction Switching
- Horizontal ABSOLUTE Scale Diameter Function
- Vertical ABSOLUTE Scale Standard
- Vertical ABSOLUTE Scale Measurement Direction Switching
- Vertical ABSOLUTE Scale Diameter Function
- Signaal kabels
- USB Input Tool Direct Kabel
- Digimatic Data Kabels
- Verlengkabels voor Digimatic Kabels
- Draadloze communicatie
- Wireless Communication System U-WAVE
- U-WAVE Bluetooth
- U-WAVE-T Connection Cables and Connection Units
- Interfaces
- USB Input Tool
- DMT-3T / FS2 USB
- DMX-1 USB
- DMX-2 S
- DMX-2 USB
- DMX-3 USB
- MUX-10F
- DMX-8/2
- DMX-16 / DMX-16C
- DMX-0-1 USB / DMX-3-2 USB
- Digimatic Interface MIG
 Original Equipment Manufacturers (OEM)
Mitutoyo OEM can address missing expertise or resources by supplying you with our renowned Metrology equipment that seamlessly integrates into your products.
 Aerospace
Complex aerospace applications need fast, extremely precise quality control to ensure accurate assemblies. See how Mitutoyo makes it happen.
 Automotive
The automotive industry continues to innovate, and Mitutoyo delivers the advanced inspection and scanning capabilities to help manufacturers achieve ongoing production
 Energy
Make critical equipment components for oil and gas, solar, wind, or nuclear as precise as possible with advanced metrology solutions from Mitutoyo.
 Medical
Boast unmatched accuracy and reliability for diagnostic and therapeutic devices, pharmaceutical goods, and countless other highly sensitive medical engineering applications with leading precision metrology solutions.
 Gen. Manufacturing
Ensure high repeatability and rigorous quality control with form measurement solutions, coordinate measuring machines and precision measuring tools from Mitutoyo.
 Electronics
The non-contact and vision measurement solutions from Mitutoyo bring microscopic accuracy to smaller and denser electronic components.
 Case Studies
For an overview of Mitutoyo's capabilities, this is no greater place to look than our marvelous collection of case studies.
 Helpdesk Support
Gratis Helpdesk support voor klanten met service contracten
 Kalibratie Services
Laat je meetapparatuur kalibreren door een laboratorium dat je vertrouwt
 Meetservices
Laat uw werkstukken en onderdelen opmeten door onze Aukom gecertificeerde specialisten
 Reparaties & Reserve onderdelen
Reserveonderdelen en reparaties voor Mitutoyo-apparaten
 Service contracten
Klantgericht servicecontractconcept in onderhoud en kalibratie
 Mitutoyo Integrators
Integrating your measuring devices into existing processes made easy
 Product Demo's
Online of offline, vraag vandaag nog een productdemonstratie aan
 Integratie van productieautomatisering
Maak van uw fabriek een slimme fabriek met de hulp van Mitutoyo
 Oplossingen op maat
Op maat gemaakte producten voor unieke toepassingen
 Education Pack
Er is geen betere hulp dan posters of lesmateriaal van Mitutoyo, perfect voor de werkplaats of het klaslokaal.
 E-Learning
Voor degenen die geïnteresseerd zijn in metrologie biedt Mitutoyo E-Learning-cursussen om studenten, personeel of zelfs hobbyisten op te leiden.
 Online Material
Als je op zoek bent naar een snelle manier om meer te leren over meten, bekijk dan onze vele instructievideo's
 Ontdek Mitutoyo
Het grootste metrologiebedrijf ter wereld
 Merchandise
Voor degenen die in stijl over de winkelvloer willen lopen, ga naar de shop en steun je favoriete merk.
 Onze promoties
Bekijk hier of we een aantrekkelijke promotie voor je hebben.
 Alle nieuwsberichten
Lees hier meer nieuws over Mitutoyo Nederland, België en Denemarken. Deze pagina wordt regelmatig vernieuwd.
 Product informatie
Bekijk en download onze catalogus, productbrochures en meer
 Software
Download onze software en updates gemakkelijk en snel
 Verklaringen van conformiteit
Hier kun je de volledige versies voor de EU en het VK downloaden
 Gratis wallpapers
Download hier gratis de officiële wallpapers van Mitutoyo
 Mitutoyo Merk Communicatie Materialen
Hulpmiddelen voor Mitutoyo-medewerkers en externe leveranciers
 Online Catalogus
Bekijk ons uitgebreide assortiment in onze online catalogus!
-
Producten
- Terug Producten
- Producten
- Product Highlights
-
Producten per Industrie
- Terug Producten per Industrie Alle Producten per Industrie
- MeasurLink 10
- MeasurLink 10
- Medical
- Automotive
- Aerospace
- Energy
- Gen. Manufacturing
- Electronics
- Case Studies
-
Handmeetgereedschappen
- Terug Handmeetgereedschappen Alle Handmeetgereedschappen
- Schuifmaten
- Schroefmaten
-
Binnenmeetinstrumenten
- Terug Binnenmeetinstrumenten Binnenmeetinstrumenten
- Binnenmeetinstrumenten
- Binnenmeettasters
- Accessoires voor binnenmeetinstrumenten
-
Diepte meetinstrumenten
- Terug Diepte meetinstrumenten Diepte meetinstrumenten
- Diepte schroefmaat
- Diepteschuitmaat
- Diepteschuifmaat accessoires
- Hoogtemeters
- Meetklokken en Snelopnemers
- Hulpstukken en diversen
-
Kalibratie instrumenten
- Terug Kalibratie instrumenten Kalibratie instrumenten
- Hoogteschroefmaat Height Master
- Stappeneindmaat
- Kalibratie apparatuur
- Eindmaten
-
CMM
- Terug CMM Alle CMM
- Kleine en middelgrote CMM's
-
CMMs met grote afmetingen
- Terug CMMs met grote afmetingen CMMs met grote afmetingen
- CARB-Series
-
In-Line en werkvloer CMMs
- Terug In-Line en werkvloer CMMs In-Line en werkvloer CMMs
- MACH Ko-ga-me
- MACH 3A 653
- MACH V 9106
- MiSTAR 555
-
CMM Tastsystemen
- Terug CMM Tastsystemen CMM Tastsystemen
- SurfaceMeasure
- REVO
- SP80
- TP7M
- PH20
-
Styli en accessoires
- Terug Styli en accessoires Styli en accessoires
- Styli Kits
- Rechte tasters
- Diamant Tasters
- IJkkogel Keramiek Ø10,0 mm
- Tasters voor bewerkingsmachines
- Ster Tasters
- Tasters voor Ster Tasters
- Cilinder Tasters
- Schijf Tasters
- Tip Tasters
- Verlengstukken
- Houders
- Adapters
- Verbindingstukken
- Bevestiging voor taster onderdelen
- Gereedschappen voor Tasters
- StyliCleaner
- Opspansystemen
-
KMG behuizing
- Terug KMG behuizing KMG behuizing
- CMM Behuizingen
-
CMM Software
- Terug CMM Software CMM Software
- MiCAT Planner
- MCOSMOS
- MAFIS Express
- MSURF
-
Vision
- Terug Vision Alle Vision
-
2D Vision Meetsystemen Quick Image
- Terug 2D Vision Meetsystemen Quick Image 2D Vision Meetsystemen Quick Image
- Quick Image
- Quick Image Software
-
Manueel 3D Vision Meetsystemen Quick Scope
- Terug Manueel 3D Vision Meetsystemen Quick Scope Manueel 3D Vision Meetsystemen Quick Scope
- Manual Quick Scope
- Quick Scope Software
-
3D CNC Vision Meetsystemen Quick Vision
- Terug 3D CNC Vision Meetsystemen Quick Vision 3D CNC Vision Meetsystemen Quick Vision
- Quick Vision ACTIVE
- Quick Vision APEX / HYPER
- Quick Vision ACCEL
- Quick Vision ULTRA
-
3D CNC Multisensor Meetsystemen Quick Vision
- Terug 3D CNC Multisensor Meetsystemen Quick Vision 3D CNC Multisensor Meetsystemen Quick Vision
- Quick Vision Hybrid
- Quick Vision WLI
-
Serie 365 - CNC Visionmeetsysteem
- Terug Serie 365 - CNC Visionmeetsysteem Serie 365 - CNC Visionmeetsysteem
- MiSCAN APEX 404
- MiSCAN HYPER 302
- MiSCAN HYPER 404
-
3D CNC Meetsystemen voor Micro Geometrieën
- Terug 3D CNC Meetsystemen voor Micro Geometrieën 3D CNC Meetsystemen voor Micro Geometrieën
- UMAP Vision Systems
- UMAP Software
- Vision System Software
- Objectieven en kalibratiekaarten
- Optisch
- Vorm
-
Hardheid
- Terug Hardheid Alle Hardheid
- Portable Hardness Testers
- Combination Testers
-
Vickers Testers
- Terug Vickers Testers Vickers Testers
- Vickers Hardness Testing Machine HV-110/120
- Automatic Vickers Testers
-
Micro-Vickers Testers
- Terug Micro-Vickers Testers Micro-Vickers Testers
- Micro-Vickers Hardness Testing Machines HM-210/220
-
Hardness Testing Software
- Terug Hardness Testing Software Hardness Testing Software
- AVPAK
-
Reference materials and indenters
- Terug Reference materials and indenters Reference materials and indenters
- Hardness reference materials
- Hardness indenters and replacement balls
-
Sensoren
- Terug Sensoren Alle Sensoren
-
Meettasters
- Terug Meettasters Meettasters
- ABSOLUTE Digimatic Linear Gauge LGS Series
- Air Drive Unit
- ABSOLUTE Digimatic Linear Gauge LGD Series
- Standard Linear Gauge LGF Series
- Linear Gauge LG100 Series
- Linear Gauge LG200 Series
- Slim Head Linear Gauge LGK Series
- Slim Head Linear Gauge LGB Series
- Large Measuring Range Linear Gauge LG
- Laser Hologauge
-
Lage meetkracht meetinstrument
- Terug Lage meetkracht meetinstrument Lage meetkracht meetinstrument
- LITEMATIC VL-50 Gemotoriseerde lage meetkracht, zeer hoog nauwkeurig meetinstrument
- Tellers en uitleeseenheden
- Laser Scan Micrometers
-
Surface Measure
- Terug Surface Measure Surface Measure
- Surface Measure 1008S
- Accessories
- Sensor Management Software
-
Digital Scales
- Terug Digital Scales Alle Digital Scales
- DRO Linear Scales en Tellers
-
NC Linear Scales
- Terug NC Linear Scales NC Linear Scales
- NC Linear Scales ST36
- NC Linear Scales ST46-EZA
- NC Linear Scales ABS ST700
- NC Linear Scales ABS ST1300
- NC Linear Scales AT211
- NC Linear Scales ABS AT1100
- NC Linear Scales ABS AT1300
- NC Linear Scales AT402E
- NC Linear Scales AT203
- NC Linear Scales AT402E with cable A/B
- NC Linear Scales AT402E with cable C
-
Opbouwlinialen
- Terug Opbouwlinialen Opbouwlinialen
- Horizontal ABSOLUTE Scale Coolant Proof IP66
- Horizontal ABSOLUTE Scale Standard
- Horizontal ABSOLUTE Scale Measurement Direction Switching
- Horizontal ABSOLUTE Scale Diameter Function
- Vertical ABSOLUTE Scale Standard
- Vertical ABSOLUTE Scale Measurement Direction Switching
- Vertical ABSOLUTE Scale Diameter Function
-
Data Management
- Terug Data Management Alle Data Management
-
Data Management Software
- Terug Data Management Software Data Management Software
- MeasurLink 10
- USB-ITPAK
-
Mini Processors
- Terug Mini Processors Mini Processors
- Digimatic Mini Processor DP-1VA LOGGER
- Signaal kabels
- Draadloze communicatie
- Interfaces
-
Timerbox, Digimatic Switch Box, Tolerance Box
- Terug Timerbox, Digimatic Switch Box, Tolerance Box Timerbox, Digimatic Switch Box, Tolerance Box
- Digimatic Timerbox
- Digimatic Data Logger
- Digimatic Switch Box
- Digimatic Tolerance Box
-
Software
- Terug Software Alle Software
-
CMM Software
- Terug CMM Software CMM Software
- MiCAT Planner
- MCOSMOS
- MAFIS-Express
- MSURF
- Vision System Software
-
FMI Software
- Terug FMI Software FMI Software
- Formtracepak
- Roundpak
- Software voor hardheidstester
- Sensor Management Software
-
Kwaliteits Management Software
- Terug Kwaliteits Management Software Kwaliteits Management Software
- Measurlink 10
- USB-ITPAK
- Industrieën
- Service
- Smart Factory
-
Educatie
- Terug Educatie
- Educatie
- Education Pack
- E-Learning
- Online Material
- Over ons
-
Nieuws
- Terug Nieuws
- Nieuws
- Onze promoties
-
Evenementen
- Terug Evenementen
- Evenementen
- Alle nieuwsberichten
- Downloads
PLOTWORK is a company with strong technical capabilities in resin and metal machining and processing that actively undertakes orders involving difficult processes and short delivery times, which other companies in the industry would decline to accept.
This is a case study of the company’s efforts to improve measurement efficiency as it continuously expands its business.
CNC vision measuring system equipped with a touch probe improves efficiency in measuring complex machined parts
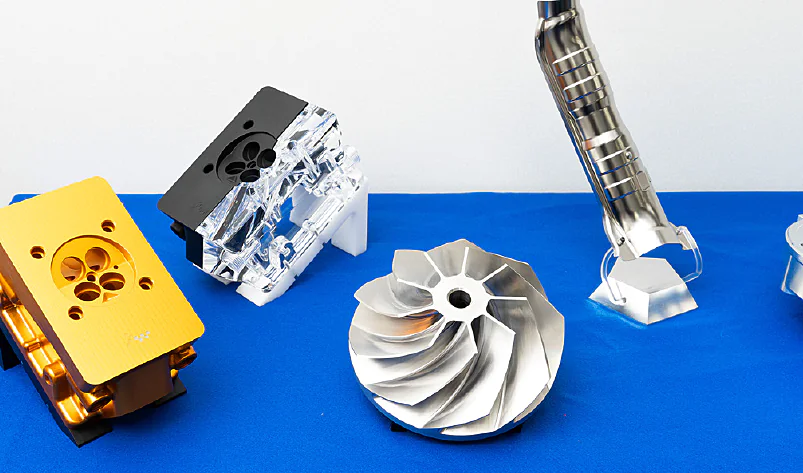
Complex resin and metal machined parts, machined by PLOTWORK
1. Customer’s Business
From resin machining to aluminum machining and 5-axis metal machining
PLOTWORK was founded in 1996 as a manufacturer specializing in prototype machining of resin parts. Responding proactively to customer requests, the company began to engage in metal machining (mainly aluminum), small-lot mass production, and hybrid processing of resin and metal. PLOTWORK’s customers come from a wide range of industries, including automotive, medical equipment, aircraft, OA equipment, and semiconductor manufacturing equipment, and the company supports manufacturing in these industries.
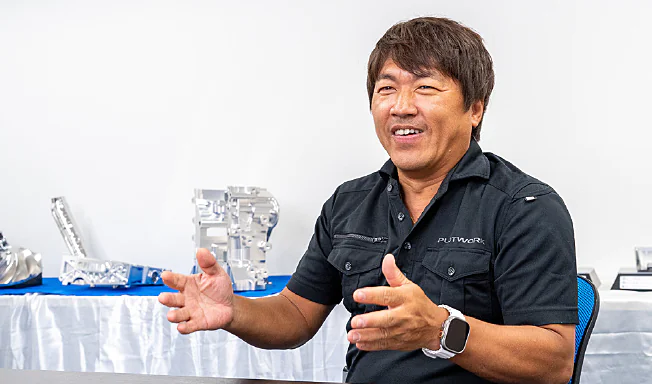
President and CEO Tsunenoshin Tamura
Actively responding to high-precision, high-difficulty, and short lead-time requests
“At PLOTWORK, we rarely process products with simple shapes. We pride ourselves on leading the way in undertaking projects with difficult shapes that other companies in the industry shy away from,” says President Tamura. The company was one of the first to introduce 5-axis machines, which were still in the developmental stages in Japan, in order to consistently process difficult products that require a high degree of precision. In addition, the company has built a system that operates 24 hours a day, 365 days a year, to supply products exactly when customers require them. Their dedication to handling high-precision, high-difficulty, and short lead-time requests has earned the trust of their customers.
2. Challenges Faced
Establishing an inspection system that offers both high precision and speed
While PLOTWORK actively accepts difficult processing and short lead-time requests that other companies in the industry would decline, achieving both high precision and speed is not easy.
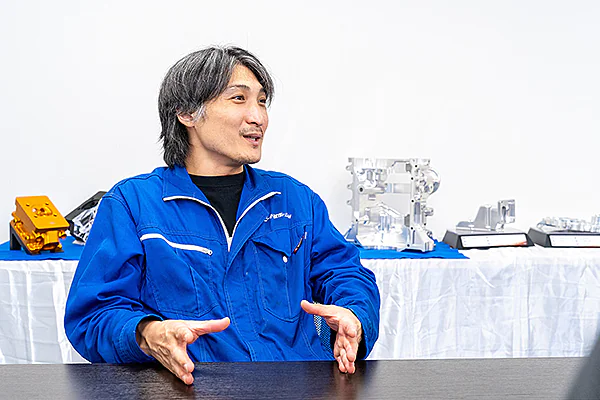
Executive Director & Plant Manager Akihiko Miyamoto
In addition to in-process and final inspections, the company also had human inspectors perform intermediate inspections, and technicians other than the machinists perform inspections to ensure precision through the eyes of as many people as possible. However, because many of the products processed by PLOTWORK had complex shapes that took a long time to inspect, which increased utilization of the existing Coordinate Measuring Machine and resulted in longer waiting times, there was a need to improve measurement efficiency.
Business expansion pushed our inspection capacity to its limits
Although PLOTWORK had steadily expanded its material and service offerings from resin to metal machining and from prototyping to mass production, the company gradually came to realize the limits of its inspection capacity. In particular, the measuring machines were occupied more often due to larger quantities of mass-produced products. Therefore, as Miyamoto, the plant manager, recalls, “reducing the time spent waiting for measuring machines to become available and the hours spent manually measuring products became a challenge.”
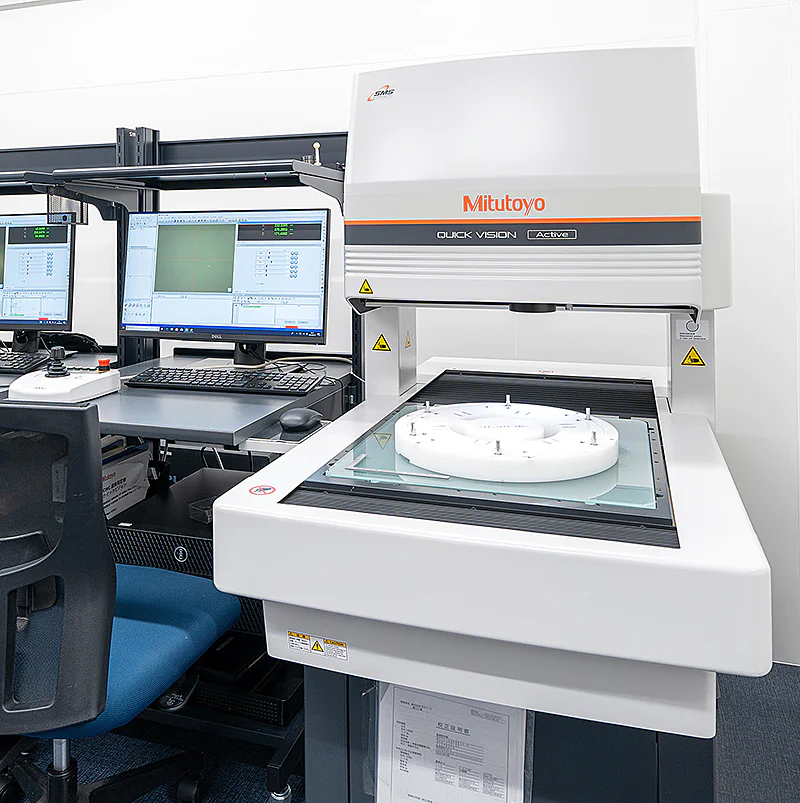
Mitutoyo’s QUICK VISION Active – CNC Vision Measuring System
3. Strategic Approach
Introducing QUICK VISION Active – Mitutoyo’s CNC Vision Measuring System
To resolve this issue, the company introduced QUICK VISION Active, Mitutoyo’s CNC vision measuring system.
The model delivered was equipped with a touch-trigger probe and could perform both contact and non-contact measurements, making it ideal for speedy measurement of products with complex shapes such as those machined by PLOTWORK. With a wide measurement range of up to 400 x 400 x 200 mm, the machine could accommodate product sizes that were difficult to measure with other companies’ vision measuring machines, and the automatic measurement feature helped to reduce personnel and labor required to complete inspection work. These factors were decisive in the company’s decision to introduce the system.
4. Solution and Results
Automating repetitive inspections of mass-produced products enabled the measurement of more products
PLOTWORK uses QUICK VISION Active’s automatic measurement feature to automate repetitive inspections of mass-produced products. Inspection Section personnel Kuninaka and Batai said, “We can easily create a part program because the system automatically records the routine the first time we complete it manually. Inspections that used to take 30 minutes can now be completed in a few minutes through automatic measurement, which has significantly reduced our inspection time.”
They then make effective use of the time saved through automation to inspect other products or set up part programs. The automatic measurement feature also makes it possible for inspections to be performed by personnel outside of the Inspection Section, or by inspectors with limited experience, reducing the company’s dependence on particular employees. The company aims to create part programs for even more products in the future to further improve efficiency.
Achieving an efficient and speedy inspection system with vision measuring systems
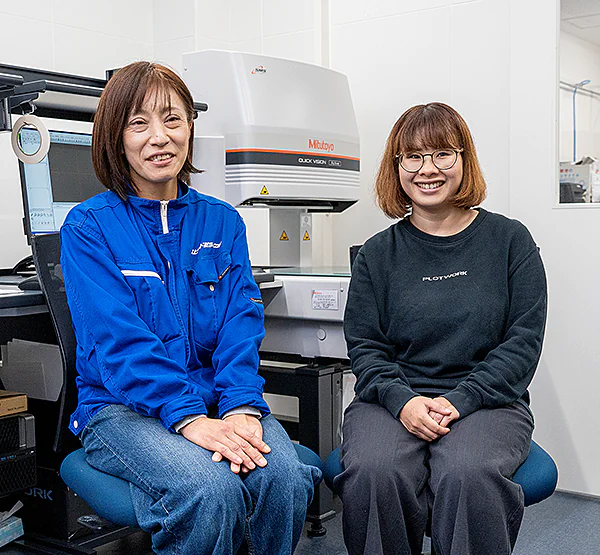
Inspection Section personnel Atsuko Kuninaka (left) and Naomi Batai (right)
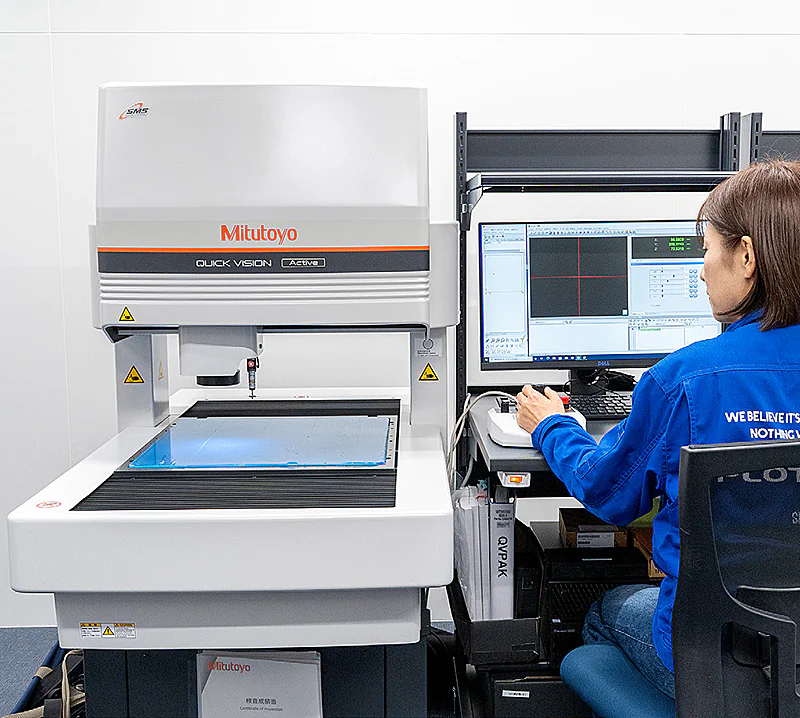
Using the QUICK VISION Active – CNC Vision Measuring System
The introduction of QUICK VISION Active, which has a wide measurement range and is equipped with a touch probe, has allowed products that were previously evaluated with a Coordinate Measuring Machine to be inspected with a visual measuring system.
“With QUICK VISION Active, not only can we perform non-contact measurements quickly, but we can also use the same system to perform contact measurements with the touch probe. It is efficient because it eliminates the need to switch to a different measuring machine,” says Inspection Section personnel Kuninaka. All of the machinists at PLOTWORK are trained to use the system, and they use it to check the finished dimensions and shape of products. Mitutoyo’s measuring system plays a key role in PLOTWORK’s inspection system, meeting the challenge of manufacturing high-precision, high-difficulty, and short lead-time products.
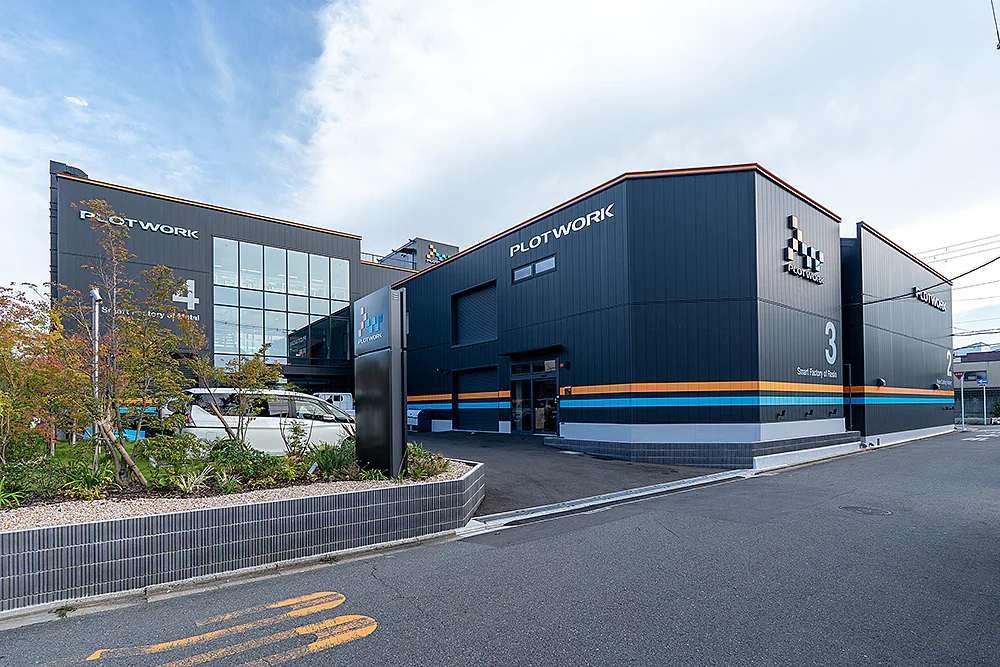
5. Future Prospects
Continuing to meet the demands of customers in Japan and overseas through relentless dedication and determination
With its advanced technological capabilities and high responsiveness, PLOTWORK has earned the trust of many customers in Japan. The company is looking to expand its business overseas in the future and is establishing a new plant in the Midwestern United States, a center of the U.S. automotive industry. We believe that PLOTWORK will make even greater strides as it continues to boldly rise to the challenge of meeting customers’ high-precision, high-difficulty, and short lead-time requests.
Customer Profile
PLOTWORK
Location: 1-5-26 Minamiterakata Minamidori, Moriguchi-shi, Osaka, Japan
Established: August 1996
Business Content: Resin machining, metal machining, etc.
URL: https://plotwork-usa.com/


